
WHAT IS A TECHNICAL SKETCH?
A technical drawing, also known as a CAD, Fashion Flat, or Technical Flat, is a thorough and precise picture of your outfit. It is commonly used as part of the Tech Pack to convey your garment’s design, structure, and stitch specifics to the factory. However, I’ve seen it utilized to enhance design presentations, as a different aspect on websites, and even as a design component on hangtags.
WHAT ARE THE IMPORTANT ELEMENTS?
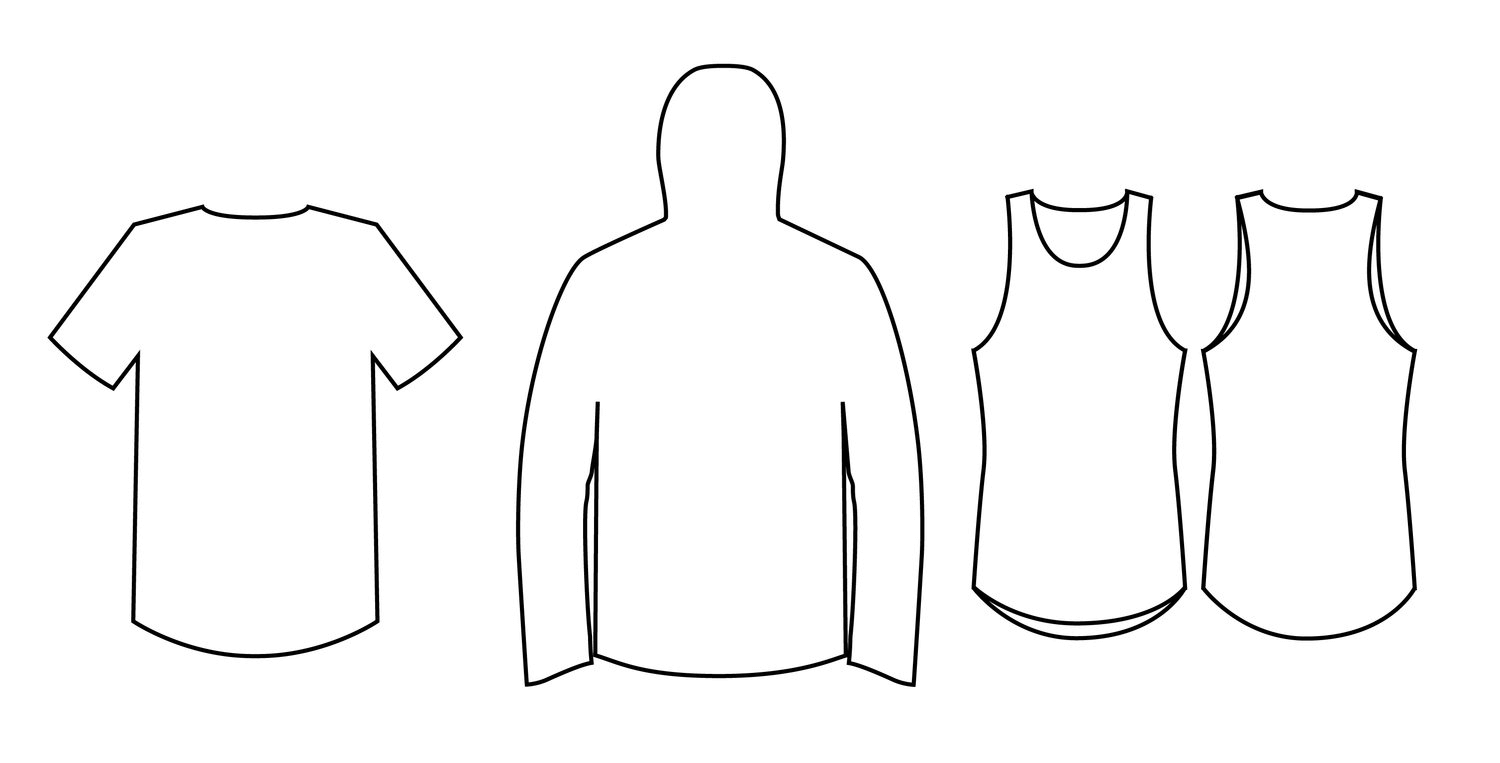
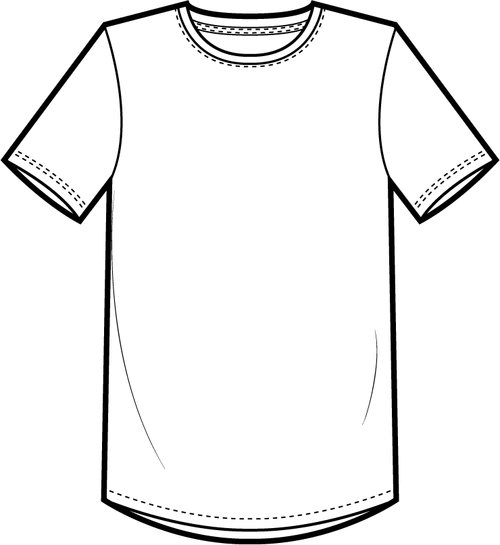
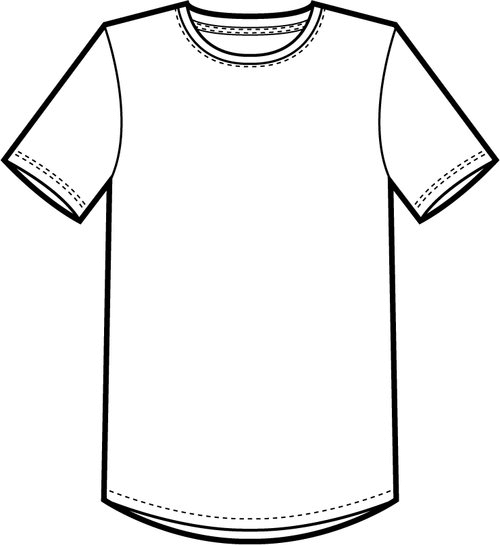
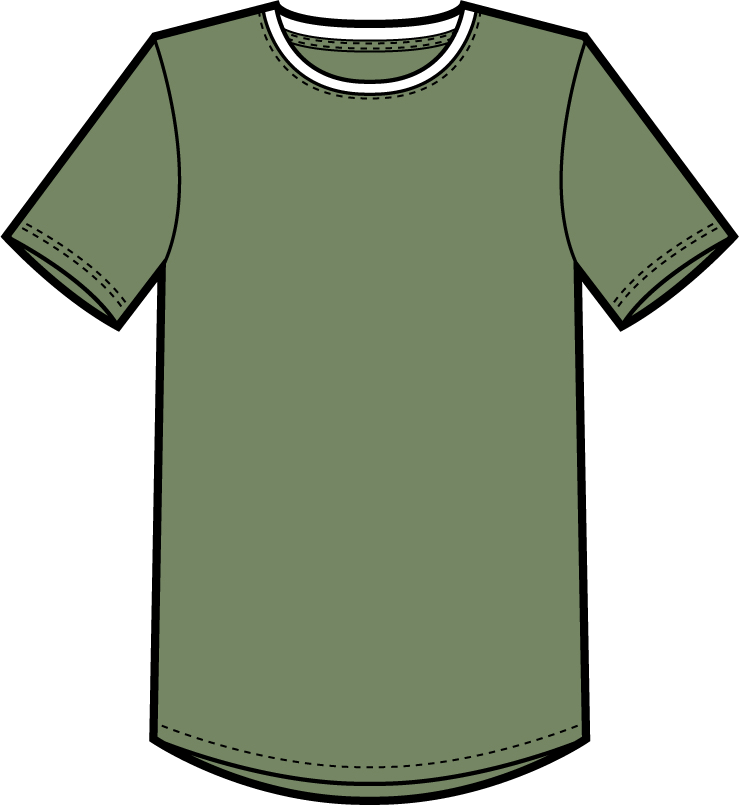
Proportions, construction details, and all garment elements must be accurately drawn in a technical sketch. With easy styles, like a t-shirt, you would only need front and back views. Something more complicated, like a snowboard jacket, would require additional detailed views of the hood interior lining and underarm seamlines.
WHAT ARE SOME OF THE APPLICATIONS?
Technical sketches serve multiple purposes in the product development journey. They can be used during production to share construction details with manufacturers, or they might exist as a placeholder for styles that are still being perfected. Technical sketches provide valuable insights on a website, hangtag, or even in a product catalog.
SECTION 1: TOOLS & WINDOWS
Adobe Illustrator is a flexible application that can be used to create complicated graphics and basic logos. In the fashion world, it is commonly used to develop technical flats, which are basic sketches of clothing items that show all the important details and measurements.
If you’re new to Illustrator or need a refresher on the basics, this tutorial will walk you through creating a technical flat using some of the program’s most essential tools. We’ll start by discussing the different types of windows you’ll be working in and then explore the various drawing and editing Tools. After this course, you’ll know how to utilize Adobe Illustrator to make technical flats.
SECTION 2: SCALE
Today we’re going to talk about scale–why it matters and when you should or shouldn’t use it in your illustrations. This is crucial for both you as an artist and the branding of your business. The way you sketch will be affected by this understanding, shapes and sizes included.
1/8 SCALE
The most widely used scale for drawings is 1/8. Other scales like ¼ or ½ can be employed when drawing infant apparel or smaller accessories. Always keep your grid visible (view > show grid) while working on a 1/8 scale because each box represents 1/8″ tall by 1/8″ wide. In other words, if you’re garments are to-scale, then each grid square equals one inch.
The first step to drawing your garment to scale is measuring it and filling out a POM sheet. With those numbers in front of you, start sketching guidelines (or create a separate layer for them) that depict the dimensions of the clothing piece. 1/8th scale usually looks weird because you’re trying to show a 3D object through only 2 dimensions–but don’t worry, that’s why we have additional steps!
PROPORTIONAL SCALE
The Industry generally uses proportional scaling because it is faster and more accurate. You also don’t need to continuously update the sketch if there are no design changes, which saves time overall.
The most effective way to recreate the figure of a garment is by starting with a few measurements and either looking at it while it lays flat or taking a picture of it. Once you’ve determined your measurements, you may start mapping out the proportions on paper or another document. If you choose to take a photo, copy and paste it into your file on photoshop (or whatever program you’re using), put it on a new layer, and then draw over the top of the image.
BLOCKS
Once you’ve figured out your basic proportion, you may utilize it as a foundation to create consistency in future sketches. Only outlines would be included in a block library, with perhaps a few details that you use frequently. You may store your block library as a regular AI file and reuse it repeatedly. To put it into practice, open the AI file, select your block, then copy and paste it into your new document.
SECTION 3: FLATS INTRODUCTION
Today, I’ll show you how I create my flats and the reasoning behind why this method is my favorite.
Step1
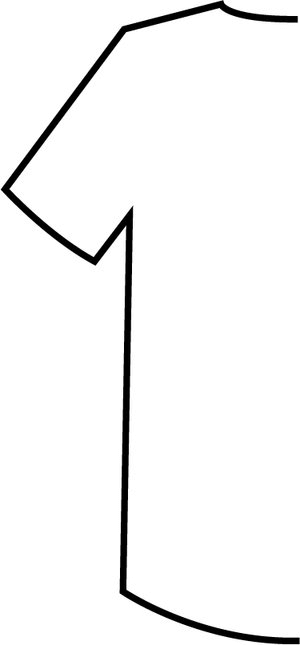
Outline your garment before manipulating it. Draw half of the garment halved vertically in the middle.
QUICK TIPS:
- Make sure your middle guide is at 90 degrees when drawing a curve. When you join your points together, this ensures a nice curve.
- 2pt line width should be used for the beginning of your outline.
- However, do not provide any information yet.
Step2
To transform your object, right-click (PC) or [control+click] (Mac), then select Transform > Reflect. Choose “Vertical” and click copy. Click the new copy, holding shift, and drag it to the other side of the guide.
To join the two objects, select both and right-click (PC) or [control+click] (Mac), and select join. Repeat this process to join both the top and bottom by selecting each object and clicking join.
QUICK TIPS:
- Ensure that the shape is symmetrical by making necessary changes to both sides.
Step3
Only add features to one side.
QUICK TIPS:
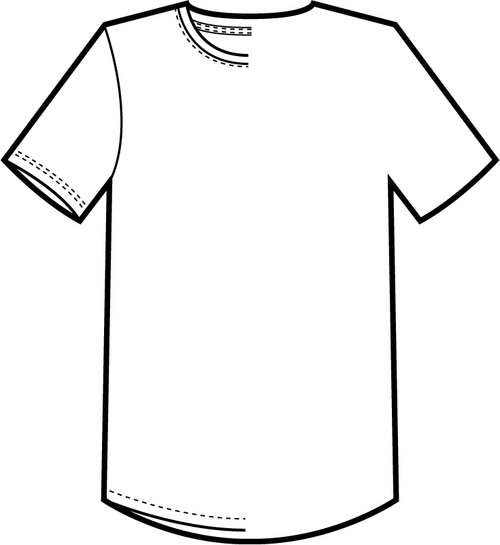
- Inside the shape, 1pt line weight hems
- All seams should have a .75pt line weight.
- The width of the fabric is 15.2m and 62cm, so a 1/8″ line can be stitched on each edge.
Step4
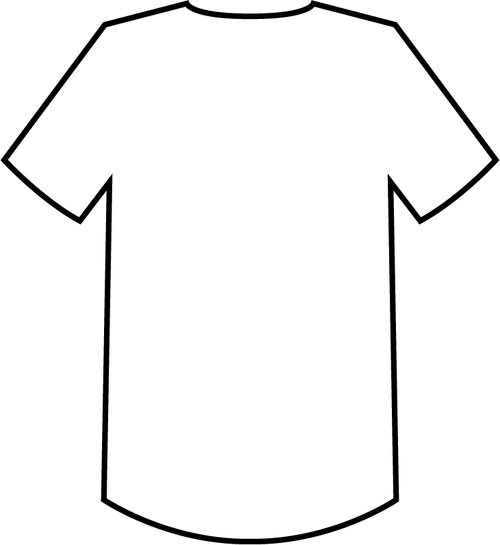
To group the entire sketch: highlight all sections of the drawing, right-click (PC) or [control+click] (Mac), then select Group. To ungroup: right click (PC) or [control+click] (Mac) and select Ungroup. If you’d like to edit the individual parts of a grouped object, double-click on it to isolate those components.
You can now finish your sketch with a nice flat drawing! Copy and paste your outline to draw the back of the garment. Then, repeat the process described above to add any other details.
Step 5
Depending on your style or what you’re trying to achieve, movement lines might be necessary to show how the fabric would drape. I’ve found that they work best when illustrating volume, darts, pleats, or ruffles. However, some people want to include them in every sketch. This can lead to factory confusion if these are mistaken as seam lines.
Draw random drag lines on the clothing to make movement lines. Change the weight to .25pt and the profile to width profile 1 (the first option in the dropdown menu).
SECTION 4: COLORING UP
HOW TO COLOR A SKETCH
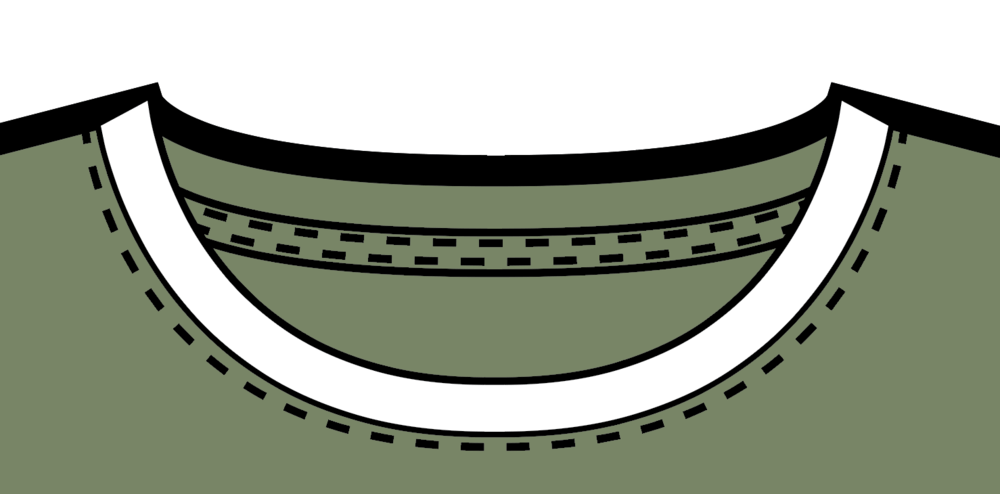
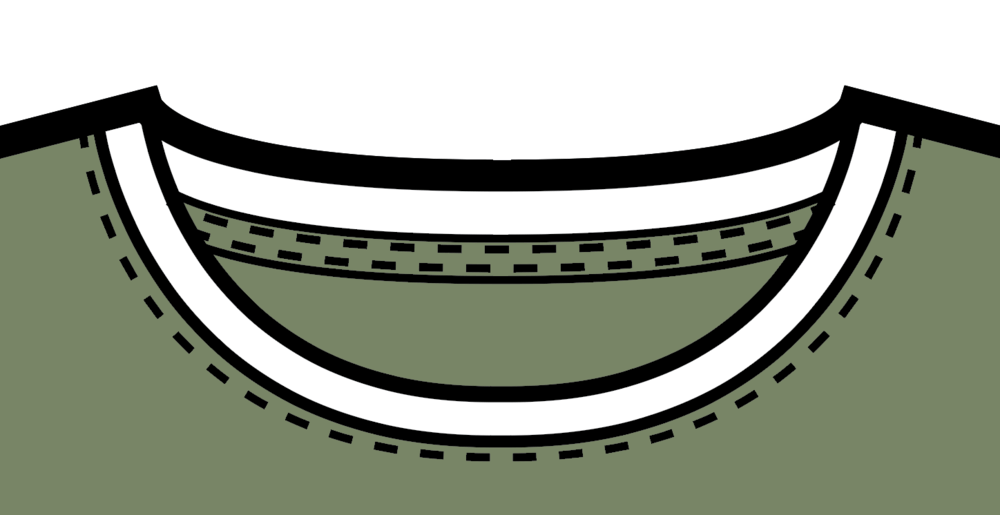
For an easy way to color your apparel flats, first Group your sketch and ensure the outline is a closed shape. To use the t-shirt example we created earlier, double-click on the Group to isolate it. Click on the outlined shape next.
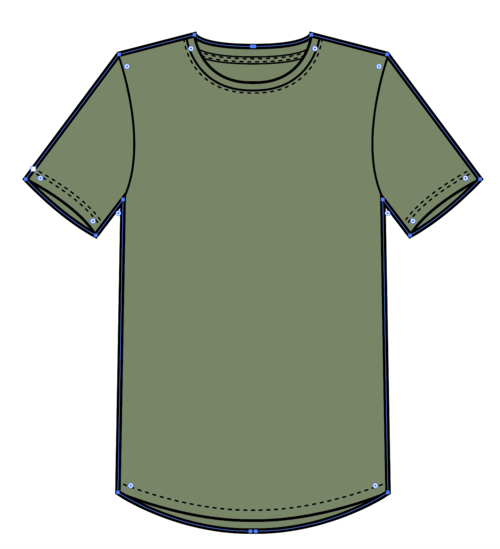
Select a shade from the swatches panel to fill your shape with color. If some of your stitch or seam lines are missing, select the filled shape and right-click (PC) or [control+click] (Mac). From the dropdown menu, choose Arrange > Send to Back.
To copy and paste, use: ctrl+c or command+c. To join, right-click (PC) or control+click and select join. Do this twice for both sides.
Select the line and fill it with a bright color, such as blue. Fill the space with a contrasting color and remove the line’s original color.
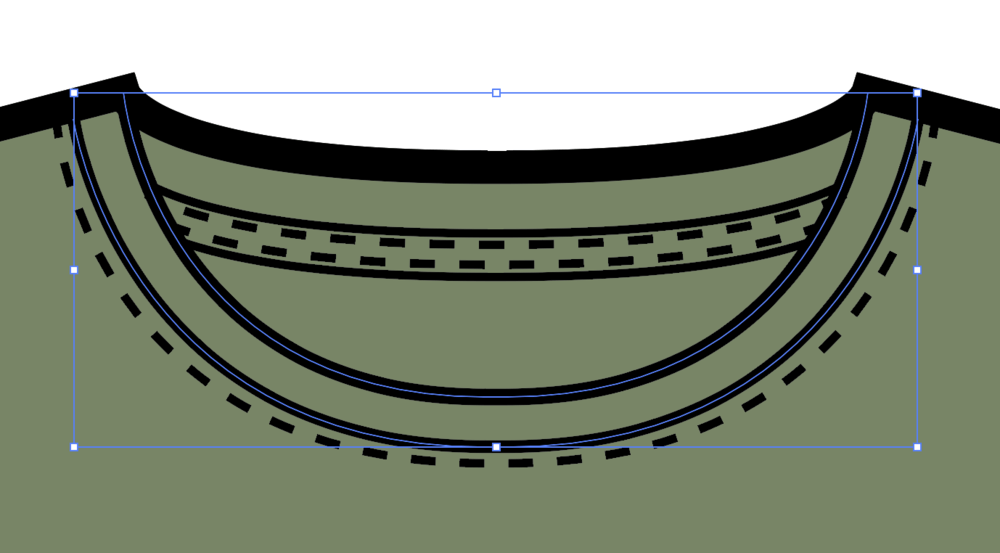
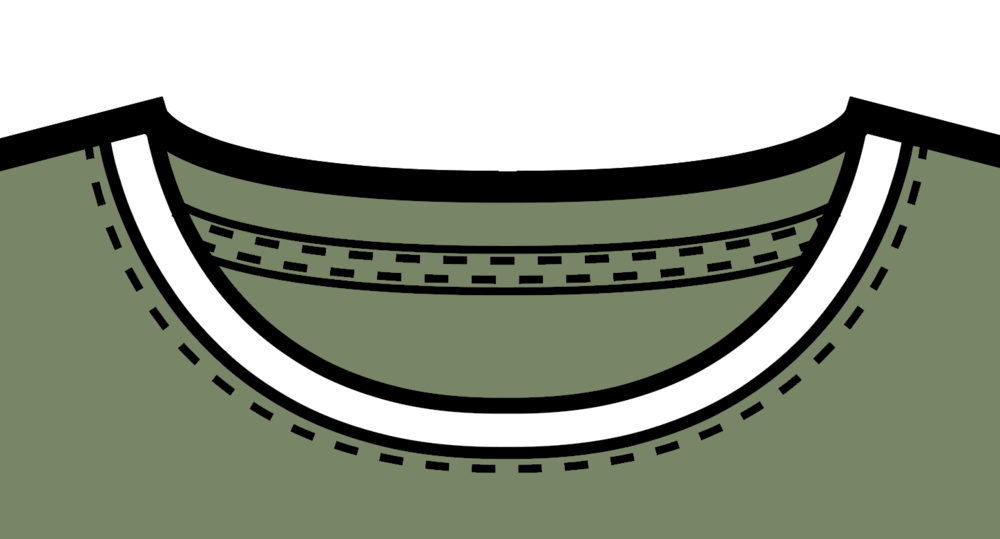
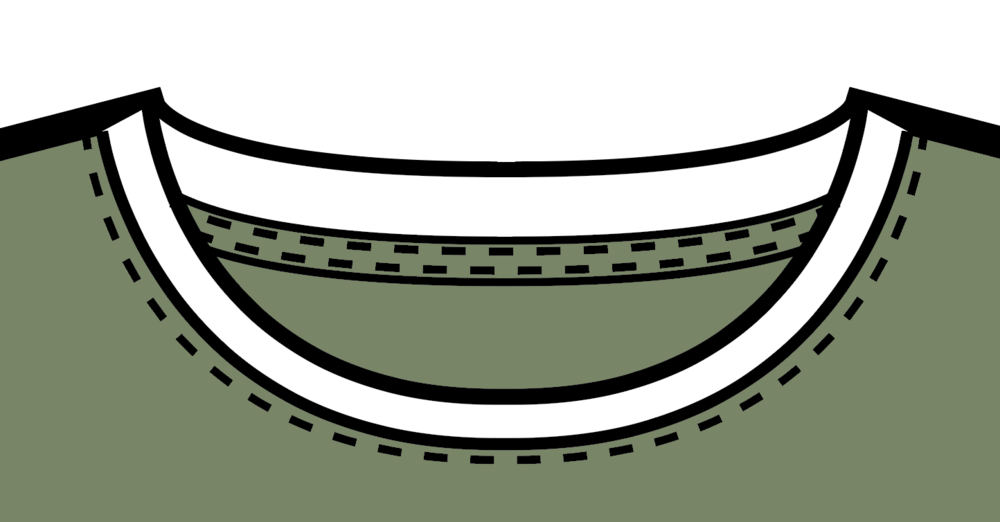
To make the seam line and neckline come forward, select the green fill and white fill, then right-click (PC) or [control+click] (Mac), and choose to Arrange > Send to Back.
Quick Tip: If you copy and paste the neck piece behind using [ctrl+c] (PC) or [command+c] (Mac), followed by [ctrl+b] (PC) orcommand + b, you can skip this step altogether.
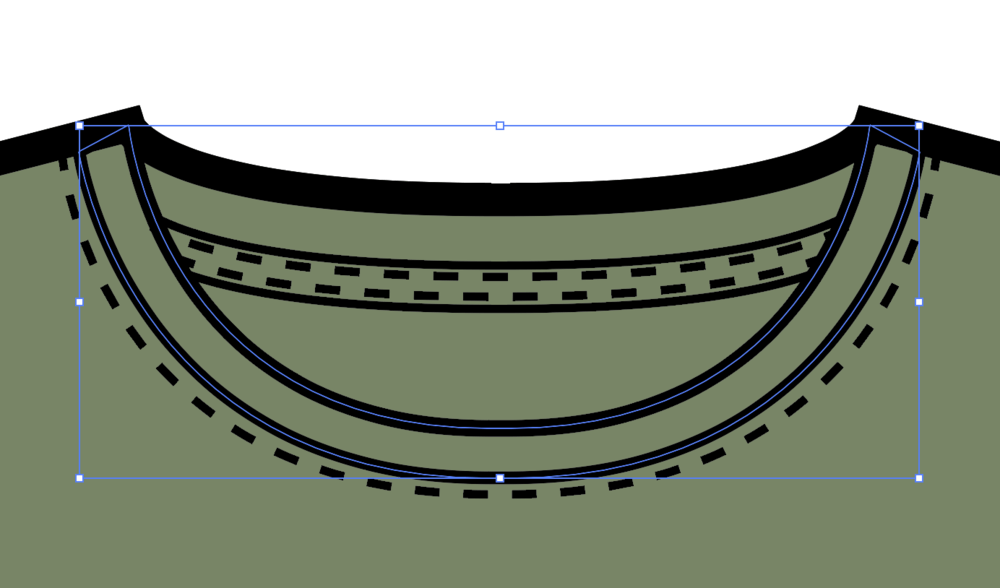
Repeat the process for the back section. Our outline is behind the white forms because the green-filled shape is in the rear, as seen in Figures 4-3.
To fix this, select the green filled shape, then press ctrl+f or command+f to change the fill to none. Then, right-click (PC) or control+click and select Arrange > Bring to Front.
SECTION 5: BRUSHES
HOW TO CREATE A BRUSH
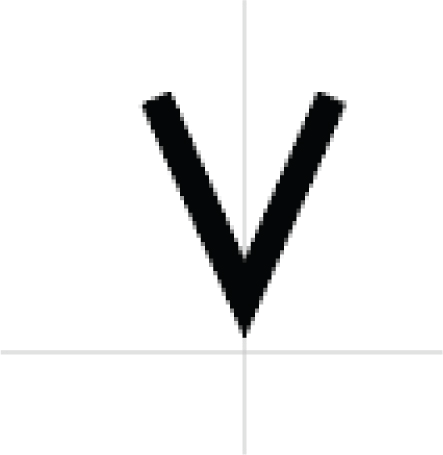
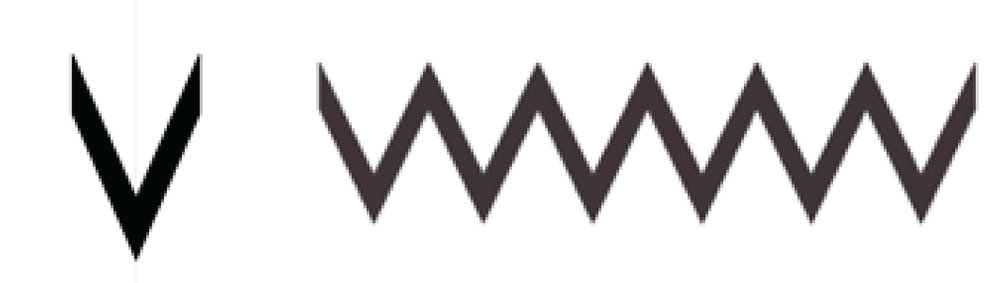
Before you start, decide which part of the pattern you would like to duplicate. We will be making a bartack stitch brush in this example. Begin with a “V,” approximately the size you want the final stitch to be. Make sure the “V” is symmetrical and level; I used a .15pt line for mine.
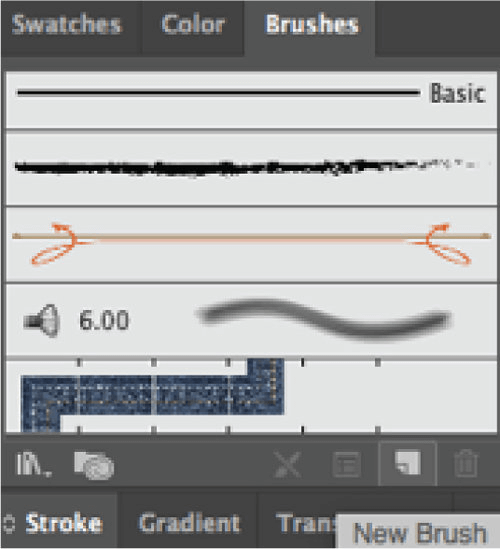
Select the “V” shape and go to the brush window. From the lower panel, choose “New Brush.”
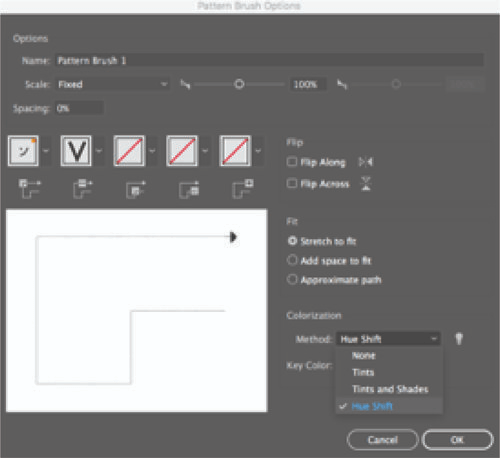
To begin, choose “Pattern Brush” and then “OK.” You may play with size, how the brush repeats, what your corners look like, and spacing in the next window. We’ll keep the defaults as they are for this brush. From the “Method” dropdown menu at the bottom of the pop-up window, under “Colorization,” pick “Hue Shift.” By changing the color of our paths from the swatches panel, we can save time by not having to create new brushes for every painting. Also, at the top of this window, we can name our brush. This is useful if you need to arrange a huge number of brushes.
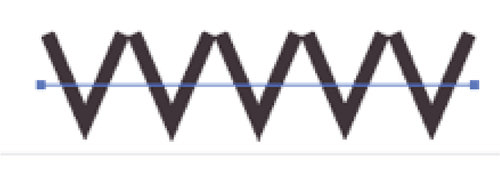
After you hit OK, the new pattern brush will show in the brushes window. Create a path and select the brush to see if it’s repeating as desired.
You’ll notice that the brush repeats at the edge of your object and doesn’t overlap–something to keep in mind when making other types of stitch brushes. You can also adjust its line weight to make it bigger or smaller and adjust its color too.
To make a brush that looks like it’s overlapping, create a “V” shape with smooth edges. After that, repeat the same steps from before.
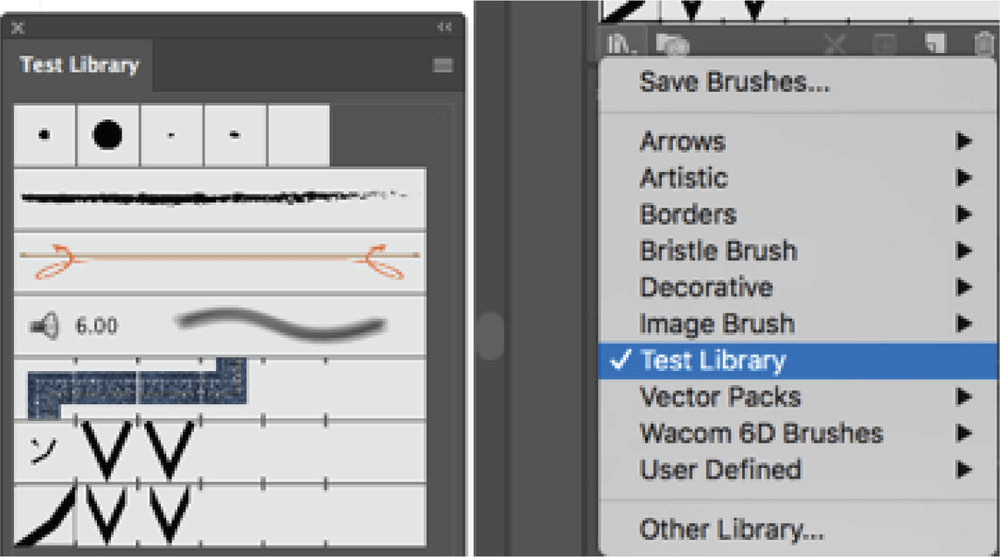
BRUSH LIBRARY

To make a brush library, save all your created brushes to one AI file. Remove any undesirable brushes from the brushes window if necessary. Select file> New Brush Library in the menu bar at the top right of the screen.
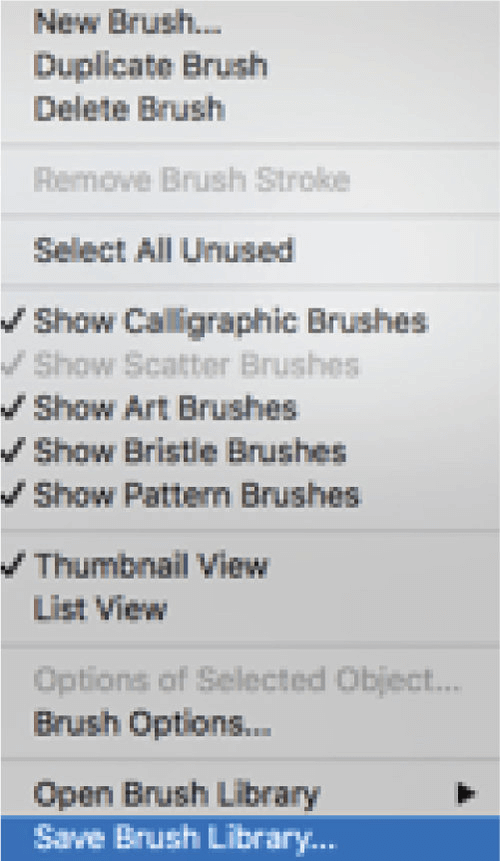
From the dropdown menu, select “Save Brush Library.”
After you create the brush library, save it under Applications > Adobe Illustrator > Presets > en_US. To determine whether your library is accessible, click on the symbol for the library at the bottom of the brushes window and select your new library from the dropdown menu.
SECTION 6: SYMBOLS
HOW TO CREATE A SYMBOL
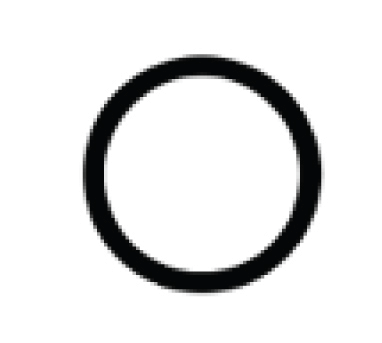
First, use the shape tool to create a circle .15pt, and at the scale, you want for your garment. We’ll make a button in this example.
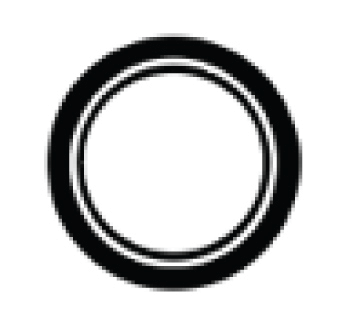
n the next step, make a second circle behind by pressing ctrl+c or command+c then ctrl+f or command+f to paste in front, then right-click (PC) or control+click. Select Transform > Scale from the dropdown menu. In the “uniform” box, type 80%, then click OK. Change the line weight to .05pt by selecting it in the Line Weight dropdown menu.

Create 4 smaller internal circles to create buttonholes, using the align tools at the top of your screen for precision.
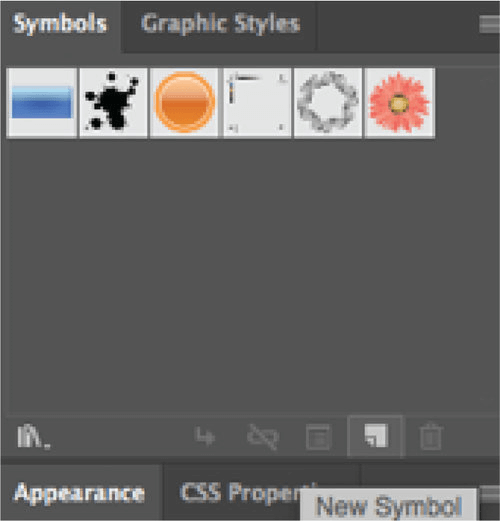
Please select all objects and group them (you can find instructions on how to do this under the t-shirt flat example). Afterward, go to the symbols window and click on the new symbol button at the bottom.
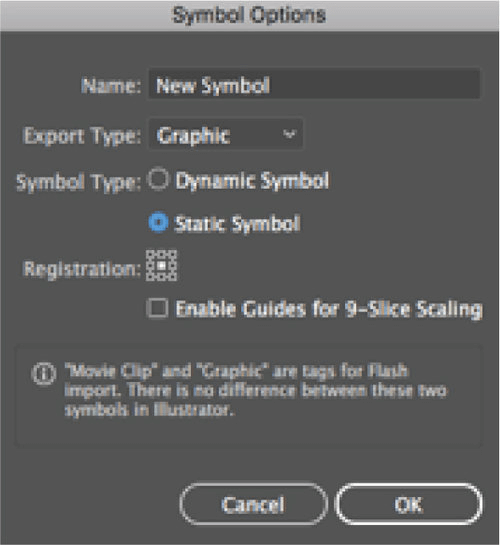
Click the Export option in the dropdown menu, then choose “graphic” as the export type and “static symbol” as the symbol type. At the top of the screen, you may name your symbol. It’s easier to locate it using a name. OK, it should be selected.
Your symbol will appear in the symbols window after it is added. Drag and drop your symbol on your artboard where you want it to go. To use a symbol you want to modify, choose “break the link” at the top of the document. It will remain grouped as a symbol that you cannot change if you do not break the connection. If you wish to edit it, all copies of the symbol will be changed unless you break the connection between them.

SYMBOL LIBRARY

To create a symbol library:
- Add all of your symbols to one AI document.
- Delete any symbols you do not want to be included in the library by clicking on them and pressing “delete.”
- Click on the menu button at the top of the symbol window to finalize your selection and open up your new symbol library!
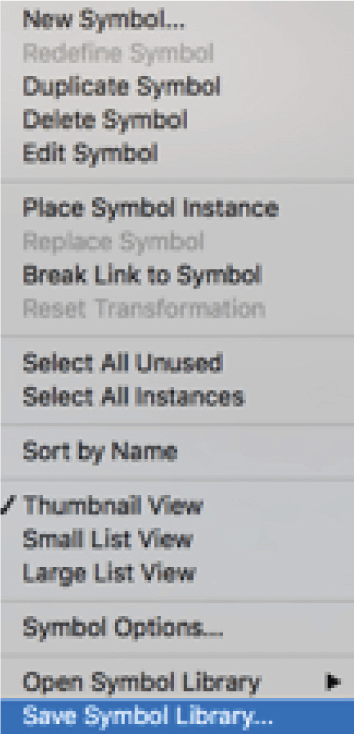
Choose “Save Symbol Library” from the dropdown menu.
To save the symbol library:
- Go to Applications > Adobe Illustrator > Presets > en_US
- Click on the Symbols folder
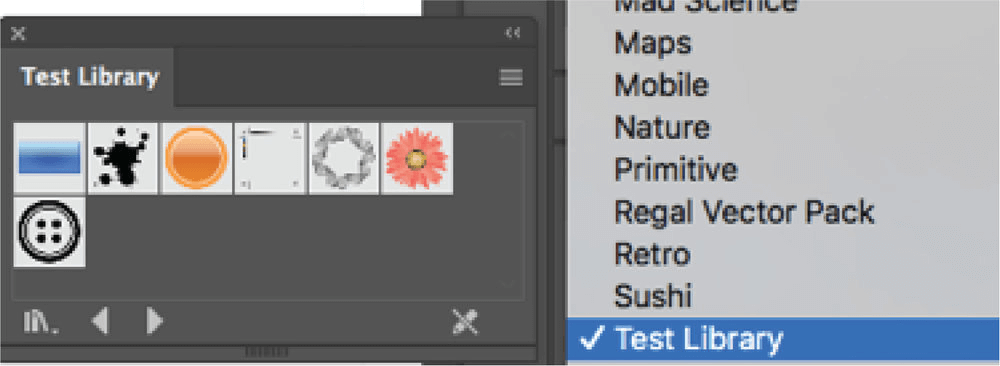
- Test if your library is accessible by clicking on the symbol at the bottom of the window. Select the newly formed library from the dropdown menu.
SECTION 7: PATTERNS
HOW TO: CREATE A PATTERN
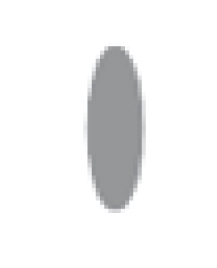
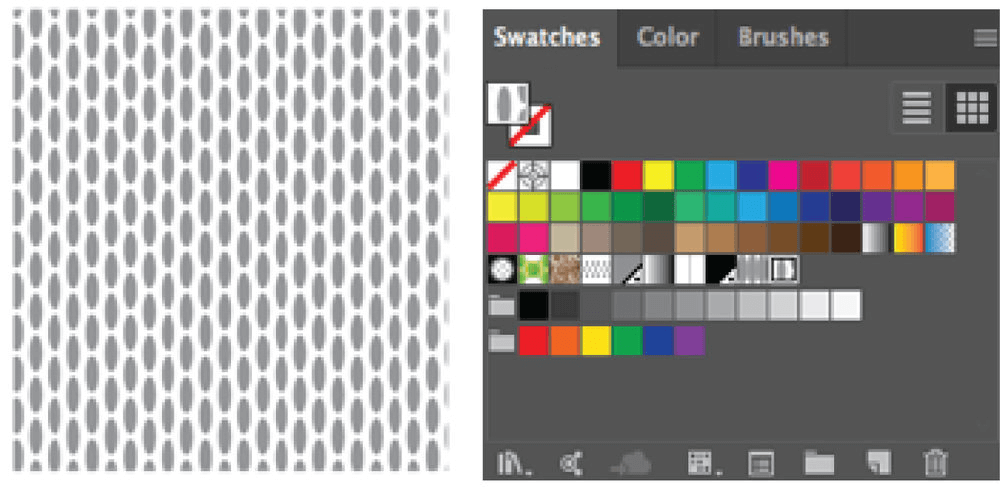
To begin, sketch out the pattern’s repeating section. We’ll draw a thin, tall oval with no outline and grey in it for this mesh.
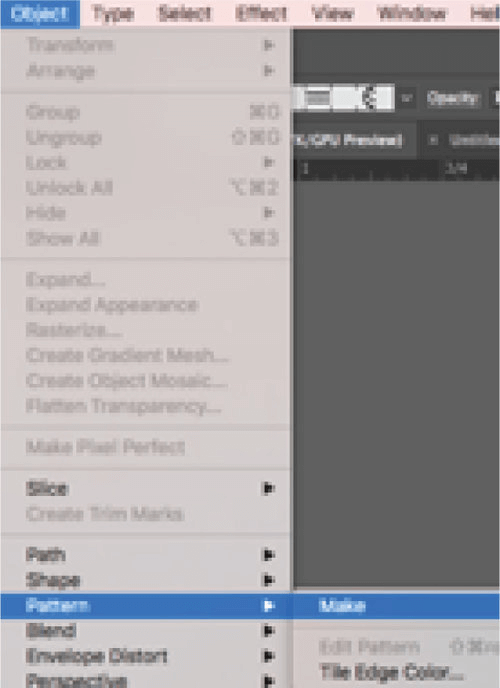
Select your item and go to pattern>make.
It looks for the image you selected to extract a pattern. If it were found, you’d see a box that tells you your pattern has been saved as a swatch in the swatch window. Accept it by hitting OK. The next screen is where you can customize your pattern. Your pattern will be tiled as a grid by default.
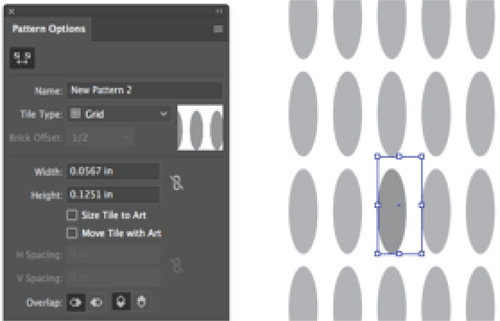
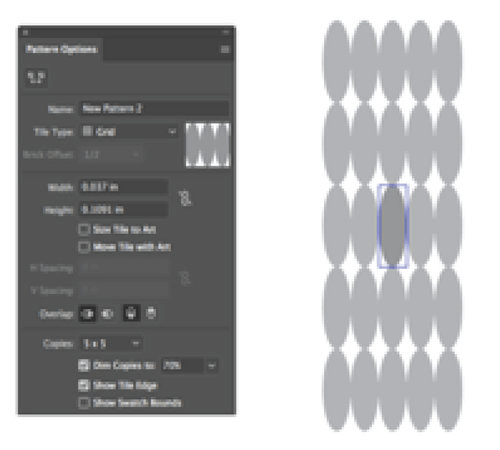
To change the tiling bounds (blue square) and space them as far as you’d like, use the box at the top of the menu.
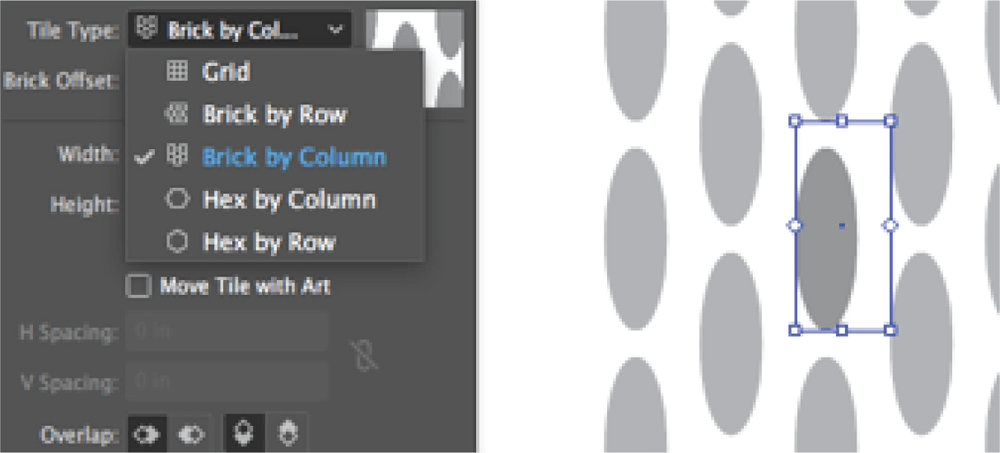
Change the tile type to brick by column to balance the mesh pattern. There are several ways to tile your repetition.
After making any necessary changes:
- Ensure your object is the way you want it. You may also modify your item in this window.
- Feel free to give your new pattern a name.
- Select what you’d like to do at the top of the screen.
I’ll click done here to save over the swatch that is created automatically in the swatches panel for this example.

You can now select any shape in the swatches panel to fill it with your desired pattern. If you need to edit your pattern afterward, double-click on the corresponding swatch, and you will be returned to the initial pattern editing window.
SWATCH LIBRARY

To create a swatch library, here’s what you need to do:
- Add all of your swatches to one AI file.
- Delete any unwanted swatches from the Swatches window.
- Click on the menu button at the top right of said Swatches window
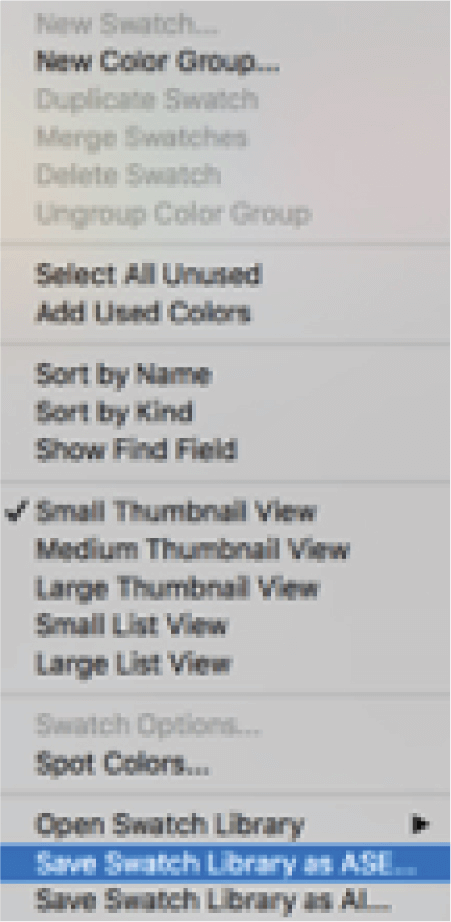
Select “save swatch library as ASE” from the dropdown menu to save your swatches as an ASE file. Note that you cannot save a pattern or gradient as an ASE file–if you attempt to do so, nothing will happen. If you’d like to save a pattern or gradient, choose “save Swatch Library As AI” instead.
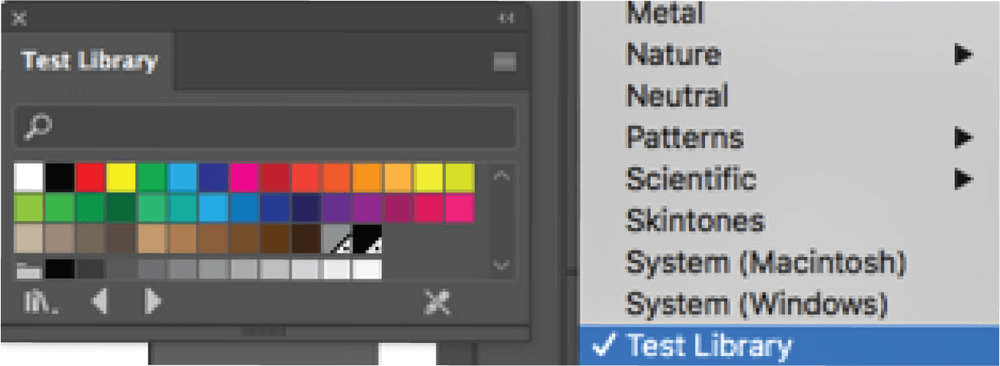
To save the swatch library, go to Applications > Adobe Illustrator > Presets > en_US. From there, select Swatches and click on the new library you created. You will know if your LIBRARY IS accessible by clicking on the library symbol at the bottom of the window dropdown menu.
SECTION 8 : SAVING
“SAVE AS” FILE TYPES
.ai = Illustrator file, This file can only be opened for editing using Adobe Illustrator. It may still be viewable without the program, but some features will not work. The file includes vector graphics made up of points connected by lines and curves.
.ait = Illustrator Template, With this template worksheet, you can easily create a new document with your desired preferences or template. To save the file as a new name, choose .ait as the file type when prompted. When saving over an existing template (for example, if updating), be sure to select the same name and location. This process will preserve anything currently in the file.
.svg = This software allows you to save any object in the file as a set of paths, which can be used for Cricut/Silhouette machines and the web. The best part is that it will recognize all paths even if they are not visible in the original AI file.
.pdf = The only visible artwork on the artboard is saved as .pdf. It’s uneditable, and best format for printing saves between computers because any text or pictures cannot be corrupted. When you’re ready to edit, open the Illustrator file with either a PC or Mac by right-clicking (PC) or [control+clicking] (Mac).
.eps = It allows you to save any file as an image. It’s the best file format for uploading to Photoshop online. It will recognize all routes even if they don’t appear in the original AI file. It behaves like a JPEG. This is the best format to use when moving documents between programs such as Illustrator and AutoCAD.
“EXPORT AS” FILE TYPES
.jpg = The export object allows you to save all the objects in your AI file as images in a different location.
.bmp = This feature allows you to export all the objects in your AI file as images into a separate file. This is ideal for maintaining the quality of your sketch. Additionally, bitmaps can be linked to other documents like Indesign.
.png = The primary output format is a PNG file with a transparent (or white) background. It’s used on the web.